
Natural Dyeing: A Step by Step Guide with Liz Chick

If you’d told us a week ago that avocado pits are pink and red onion skins turn yellow, we would have told you, “you’re crazy.” Yet, on Saturday, we learned that onions, avocados, and other organic waste like pomegranates can be used to create strong and vibrant dyes for fabric. New York-based sustainable baddies gathered in Clinton Hill at Liz Chick’s bright, beautiful new studio space for a workshop in natural dyeing. We gathered for the afternoon to learn, make friends, and create our own upcycled pieces. Fortunately for those who missed it (this time!), Liz and Sustainable Baddie are putting together a guide to natural dyeing, so that baddies everywhere can add this to their susty journey! As an experienced natural dyer, educator, and sustainable baddie herself, Liz wants natural dyeing to be a tool that everyone has access to. Anyone can turn their leftover avo-toast scraps into the prettiest pink scarves, socks, and so much more! Let’s DYE-ve right in ;).
There are several important steps to dyeing fabrics with food scraps and creating pieces that really last. In order to help you upcycle items that you not only love but that you can use and wear for years, Liz has plenty of foolproof tips on creating food scrap dye that can flip your latest thrift fail into your favorite ‘fit. She guided us through the process of bath dyeing with avocado pits and bundle dyeing with onion skins. Let’s break it down:
Step 1: Gather Your Materials
The Fabric:
Cellulose (plant-derived) fiber: Cottons, Linens, and Hemp
Protein (animal or insect-derived) fiber: Wools and Silks
Silk takes extremely well to natural dye, so if you find yourself with an aging or thrifted silk piece that you want to freshen up, we definitely recommend natural dyeing!
The more organic the material is, the better the dye will take; for example, a 50% cotton shirt might not dye as vibrantly as an 85-100% cotton shirt.
The Waste Materials:
Avocado Pits & Skins
Onion Skins
Pomegranate seeds and skins
Liz taught us about many different food scraps and their uses, but these three kitchen by-products are her go-to's when it comes to making long-lasting, beautiful natural dye. Pomegranates and avocados are high in tannins, meaning they last a lot longer and hold to the fabric for a more vibrant dye.
Step 2: Prep Your Materials
Gather Your Scraps:
Avocados: You can collect your avocado scraps over time (more guacamole? Yes, please!). And once you have an adequate amount for your project (3 pits, 6 avocado skins, or a combination is best for a small project, add more for a darker dye), you will want to clean your pits and skins as much as possible, dry them, and break them down into smaller pieces.
If you are struggling to break them down, you can boil the pits until they’re soft enough to work with.
Onion Skins: Collect onion skins from your own onions or gather onion skin scraps you find at the grocery store (they are everywhere). Collect enough to make a dye (again, the more you collect the deeper the dye).
We used onion skins this weekend for bundle dyeing by putting the scraps directly on our fabrics and wrapping the fabric around the skins. You can also use the scraps to make a dye bath similar to the avocado pits.
Treat your fabric*:
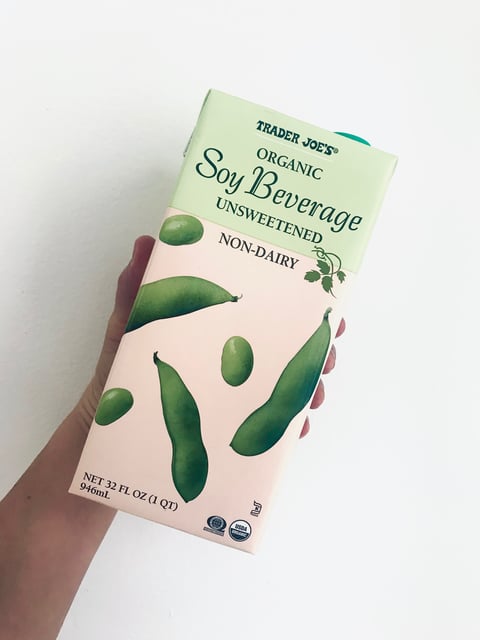
Using a Soy milk binder: mix one part soy milk with three parts water. Soy milk with minimal ingredients (like this one from Trader Joe’s, containing just water and soybeans) is recommended.
Soak your garment in the mixture overnight, stirring often for the first thirty minutes. (Make sure you keep your fabric in a large pot so it can float around in the mix.)
Let your item dry and cure (rest) for three days before dyeing
* Pre-treating your garment will help the dye hold to the clothes better and last longer. We recommend not skipping this step!

Step 3a: Natural Dye Tea for Bath Dyeing
This weekend, we dyed socks with avocado pits using a dye bath method. Liz described making the dye as similar to that of making tea. Think of your avocado pits or onion skins or pomegranate scraps as tea leaves in your massive pot of water.
Add only enough water to cover your scraps and heat over low to medium heat. Less water gives us a more concentrated dye.
Let the scraps simmer (not boil!) for as long as you want – letting them soak overnight or throughout a whole day will yield a more vibrant dye.
Once you are happy with the color you can strain out the scraps as much as possible and your tea is ready!
Leave your pot of dye simmering and add your pre-treated materials.
Let your project simmer in the dye for at least an hour.
You can leave your project overnight in the pot or throughout a whole day to yield a more vibrant dye (heat does not have to be on).
Step 3b: For Bundle Dyeing - Pressure and Steam!
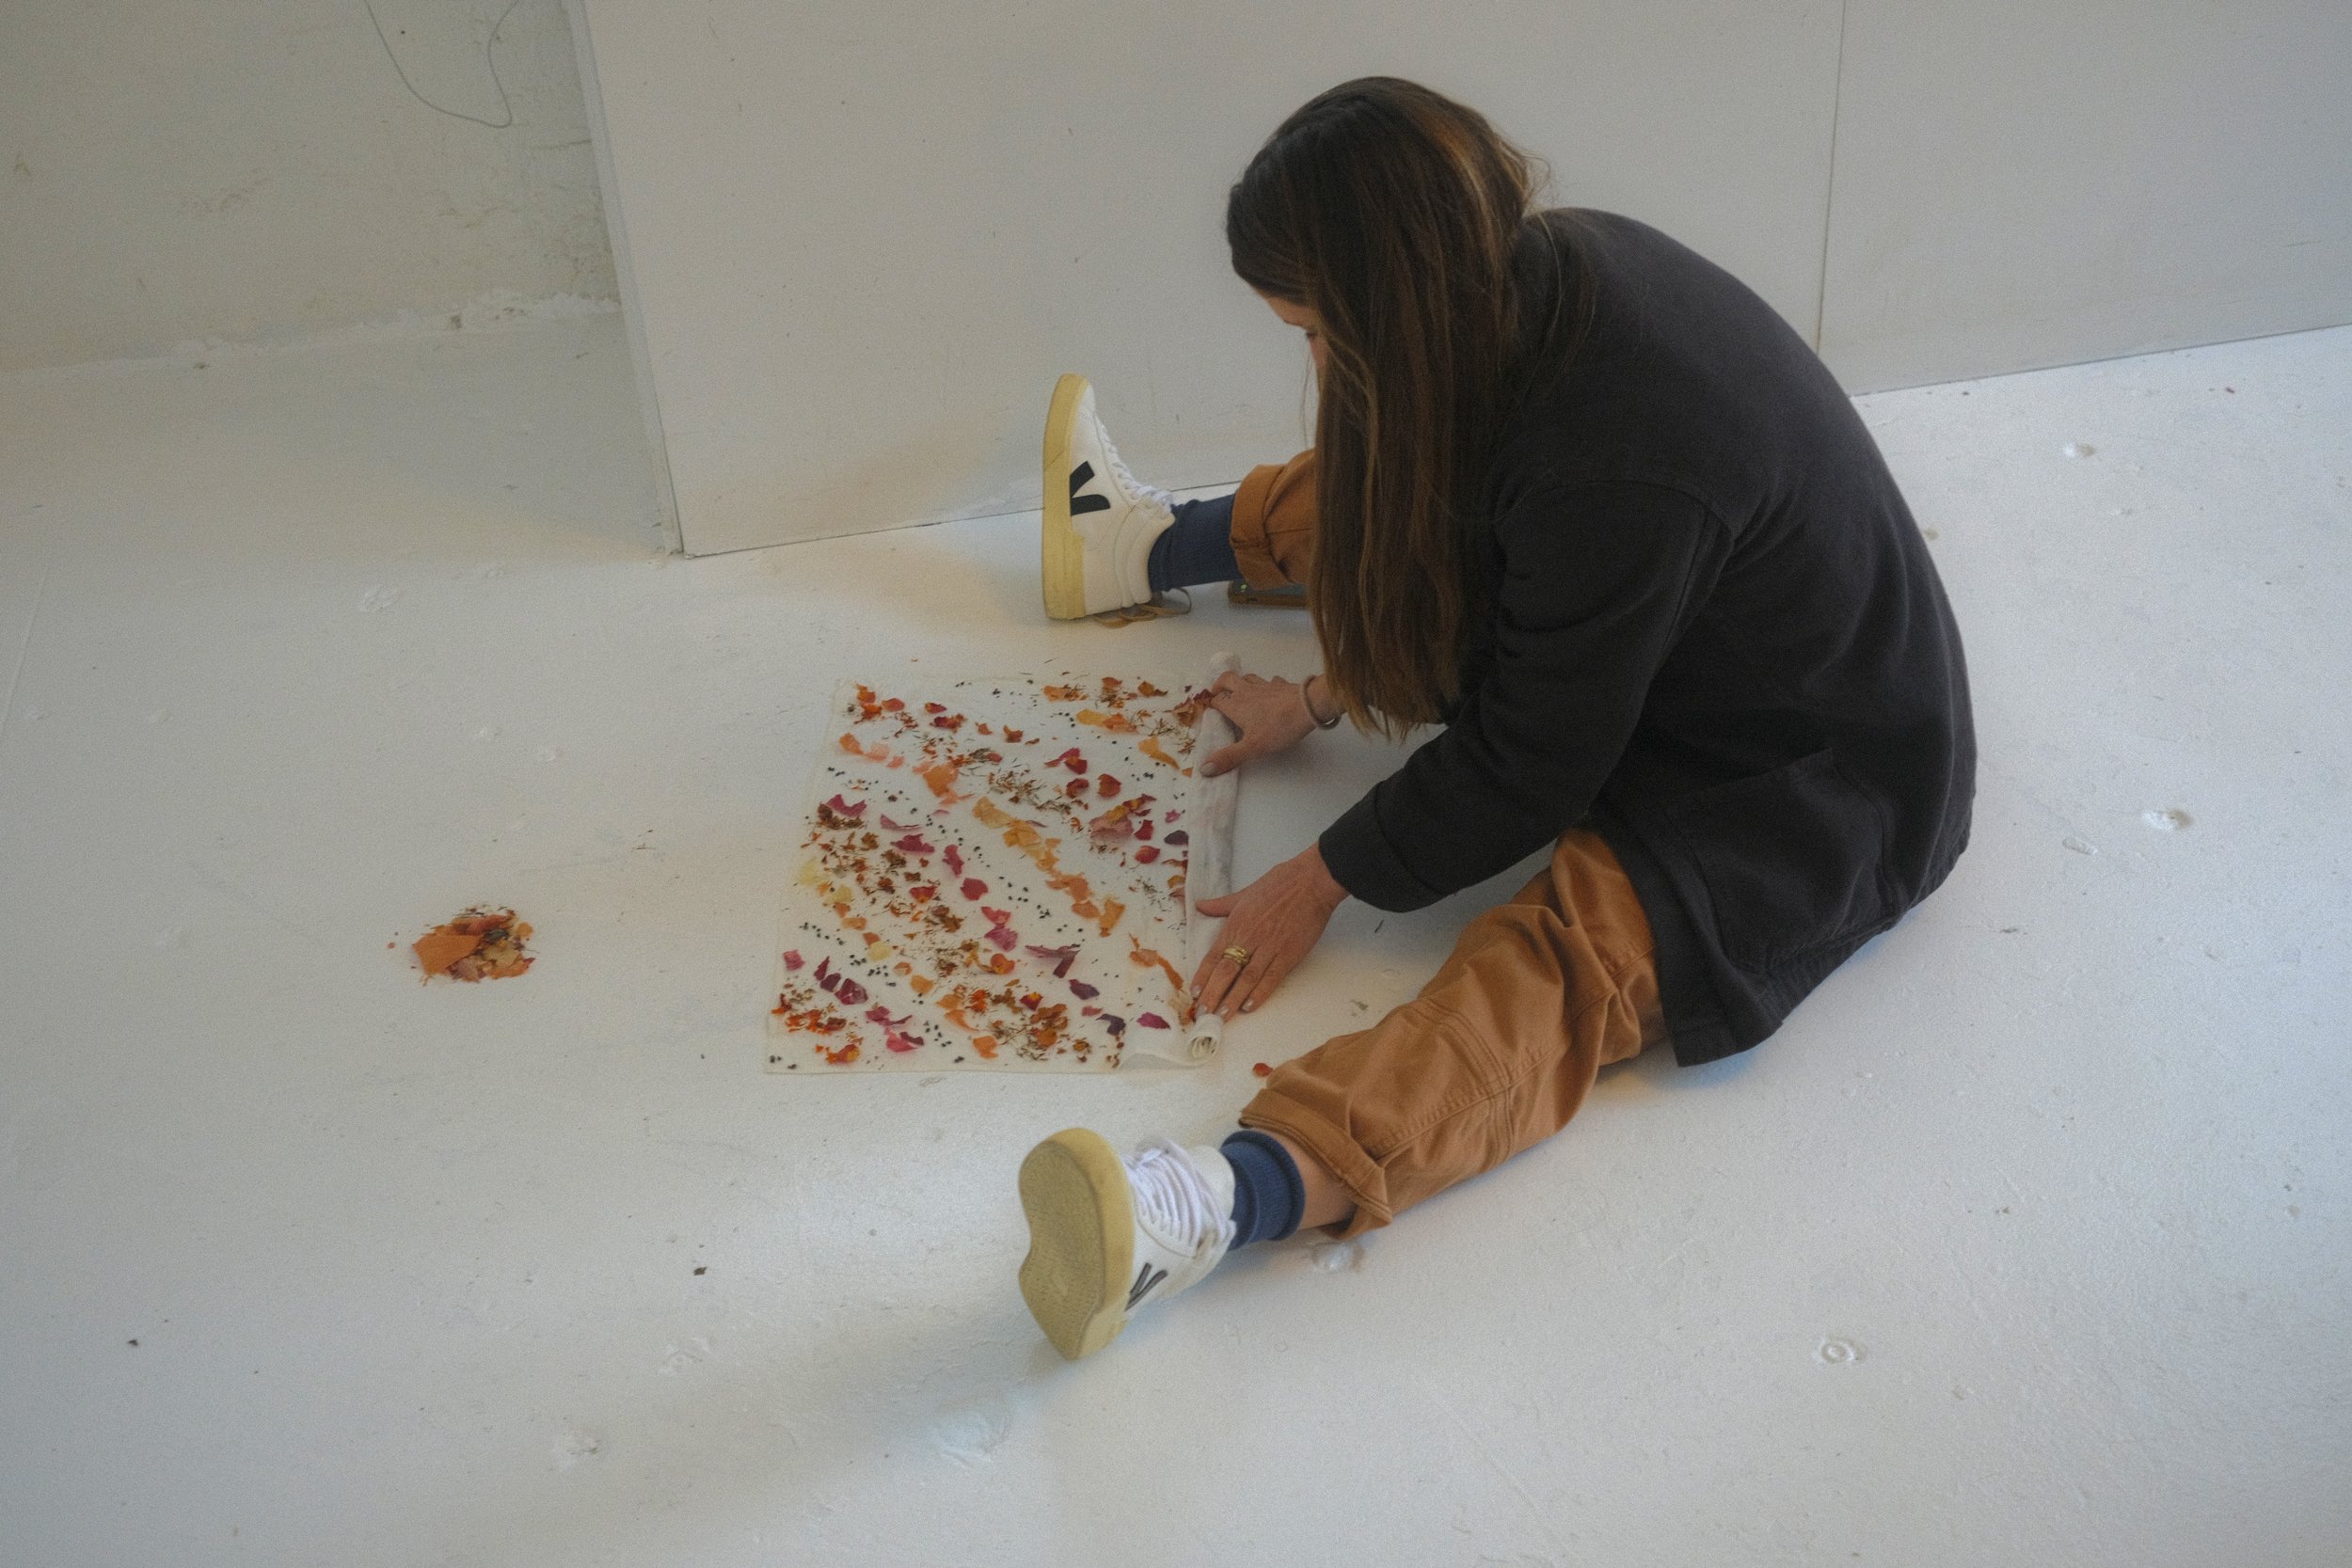
We also learned how to bundle dye, which reminded us of those good old tie-dye days from childhood. This method is simple and just requires that you bundle your fabric around the food scraps, just remember to apply pressure when wrapping your garment.
Lay out your scraps on your blank fabric – you can do this any way you want, but Liz suggests minimal white space for a more covered look.
Roll your fabric tightly around the scraps – we rolled them horizontally and then again vertically until they rolled into a tight ball, and finished by wrapping the bundle with rubber bands to hold everything together.
It’s important to use a lot of pressure when rolling the material.
Soak your ball of fabric in a bowl of room temperature water for at least a minute.
Drop your bundle into a pot of water and let simmer for at least an hour (the longer the better!).

Step 4: After Care!
So, what now? How do you make sure that your newly dyed pieces will last? Don’t worry! Liz gave us all the details on keeping our dyed projects looking fresh (and also being okay with a little bit of age!). Fortunately, Liz is like us — fuss and frill-free—so there isn’t anything too technical about caring for your newly dyed fabrics.
Wash less, on cold and by hand when possible. Your clothes can be machine washed, but she recommends only throwing them into the wash when really necessary. They will not bleed onto other clothes.
Hand washing with a PH-neutral detergent is one recommended way to yield the longest life for your garment.
Line Dry: hang your new fabrics out to dry them instead of throwing them into the dryer to maximize their life span!
If you weren’t able to join us on Saturday, we hope that you can still gain a little bit of knowledge on the natural dyeing process. If you want even more guidance, Liz has great guides and kits for making your first dye project. As an event producer and an artist, Liz prioritizes making her work accessible and inclusive. Natural dyeing is a sustainable skill that reconnects us to the natural world and gives new life to our aging materials.
For those of us who were able to participate in person on Saturday, we were grateful to share space with other sustainable baddies, to build community around regenerative practices, and to discover something new together. Thank you to all who could join us, and thank you to Liz for not only sharing her knowledge and experience with us but for creating a space to enjoy the company of others and create together. Liz’s new space is extremely inviting and welcoming and we’re eager to gather there again. Keep your eyes peeled for her upcoming projects and future collaborations!
Tried natural dyeing? Share your projects with us!